We're BACK!!!
We have been lucky enough to spend a lot of time together as a family the first few months of her life because my husband got to work from home for the first half of the year due to COVID. Which was a life saver for me being a first time mom; I've felt like a basket case most of the time and still do quite often.
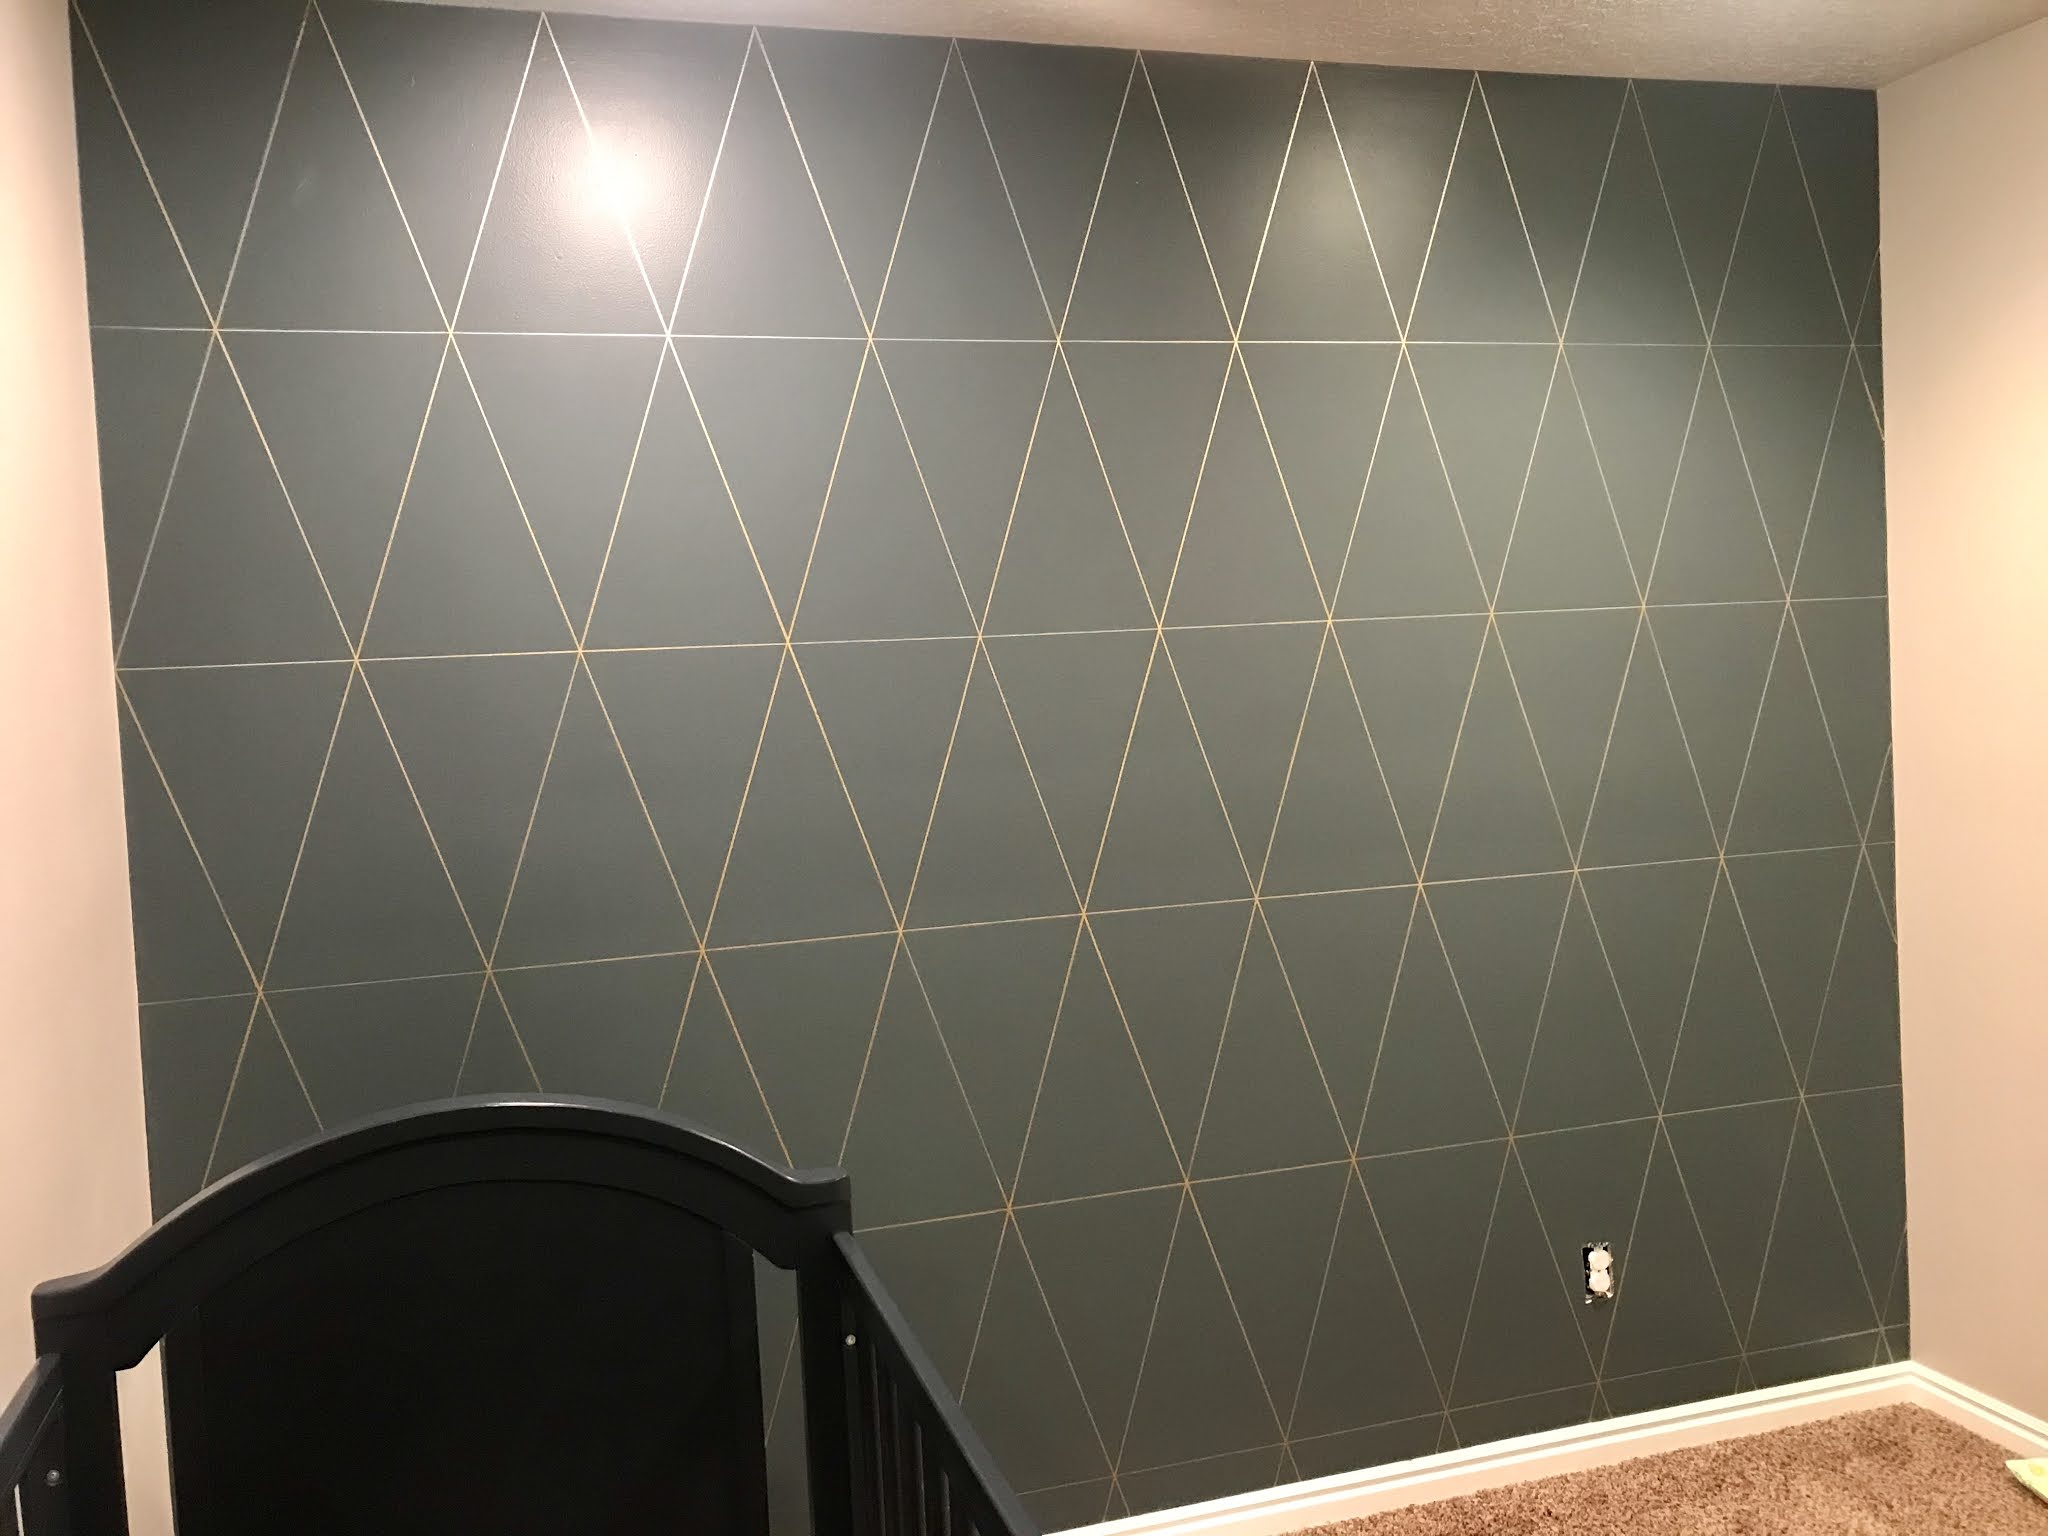
So, I thought it would be fitting to start off sharing the process of putting her nursery together. First off, choosing a color to paint the focus wall.


The color we decided to go with is Behr Brooklyn. We thought that it went well with the navy crib, white dresser, and mauve curtains we already had. But we weren't quite satisfied with it. So, we ended up doing one of those paint sharpie designed walls. We went with a gold paint sharpie to girl up the green wall a bit.

We first marked every 18 inches from top to bottom of the wall, and drew our horizontal lines. After that, where the top of the wall meets the ceiling, mark every 12 inches starting from the left side of the wall (you could also find the middle of the wall and mark every 12 inches from the center of the wall. But, that would change the next step just a little). Then we moved down to the first horizontal line and measured 6 inches over from the left side of the wall, then from there marked every 12 inches. This will make it so these marks will be in the middle of the marks previously made on top of the wall (if you found the center of the wall on the top row markings, then you would want to measure 6 inches from one of your markings, then mark every 12 inches from that mark). Then we repeated these to steps until we reached the bottom of the wall. Once we had all the markings, then it was just connecting the dots diagonally with the paint sharpie. Here is a link to what paint sharpie we use https://www.amazon.com/Sharpie-Oil-Based-Marker-Medium-Metallic/dp/B00E3XXN68/ref=sr_1_4?dchild=1&keywords=gold+paint+sharpie&qid=1606197541&sr=8-4
Once the wall was done, then it was time to pull it all together. There were a few details that I really wanted to make sure we put in there. The first one being somewhere to put all of her books. I wanted to have a spot that she would be able to easily get to them.

The next thing was to have a little mobile. I looked around for some but just couldn't find what I wanted in the colors I wanted. So it was time to make one. We went simple with using the wool pom pom balls.


Finally, I wanted to make one of our favorite sayings from, The Help, "You is kind, you is smart, you is important." We thought this is something that would be good to teach our little nugget as she gets older.

Then it was time to put everything together, and this is what we came up with. We are extremely happy with how it turned out and the best part is, we didn't spent too much and didn't have to do a whole lot to make it.


Wow! That's beautiful
ReplyDelete